


Hey, Be sure to check here every two weeks for more news on what the flip I've been up to. Right here on Newgrounds. Don't miss out!
If there is one thing that's true, it's this. Working on any project is rarely a straight line, when it comes to making a game that comes doubly so. To say I almost ripped all my hair out would be putting my frustration lightly. I am however fortunate that I came up with solutions in the end.
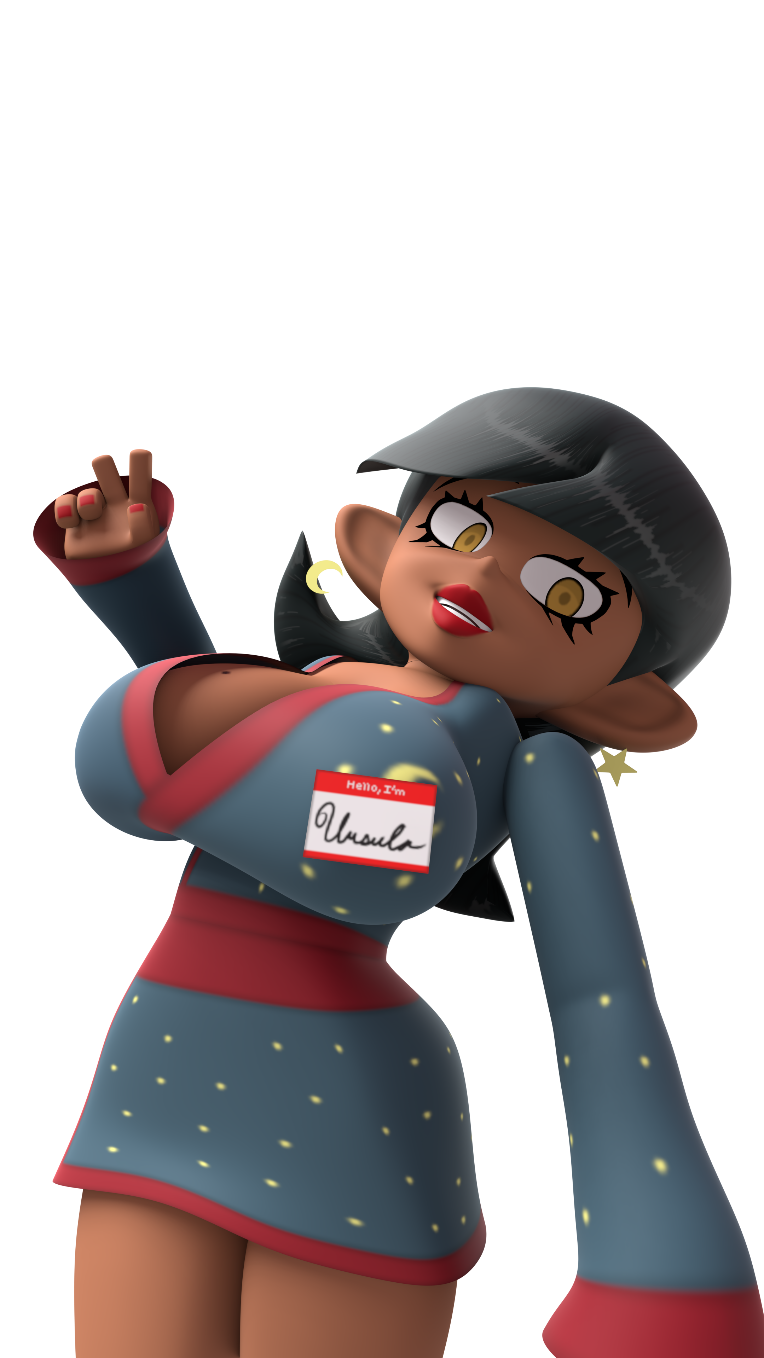
Over the past two weeks my main goal has been Figuring out details for character designs and animation. My goal was to explore solutions for different character types and the general technical aspects of getting each characters working. Lately I've been shoring up my ranks with simple pallet swaps as a place holder. It makes designing new character behaviors possible without knowing exactly what the character is going to look like or have a model ready for them.
During this process I asked my self the question... What about a bird character. If I knew the kind of hell this one thought would drag me through I would have never even considered it.
So what's so tricky about a bird?
Simply put, nothing much. The problem lies in the fact that each character will be sharing a large number of animations to speed up animation production.
So while designing her, I had to do so with limitations in place. For the Eyes and Mouth all I've been doing for them was simply placing a texture on them. The animation is simple but effective for a cartoony look. So given this limitation... How do I do a beak?
The BEAK PROBLEM!
So I quickly put together a quick bird girl. Nothing fancy, She still needs a lot of work but the most important bit was the beak.
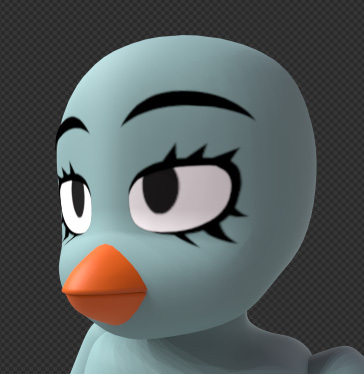
Simple Bird Girl.
So now I asked my self how do animate the beak. To fit in with my current scheme I tried to come up with a solution with textures. And I did after a bit of brain storming the solution came to me.
Use a texture that contains vertex displacements to animate the beak, GENIUS I SAY!
But how do I make that texture?
Making the texture.
Usually, you use your 3D Modeling software to generate these more exotic textures, Textures such as normal maps. These textures could be done by hand but due to their technical specifications it's usually best to let a computer do it for you.
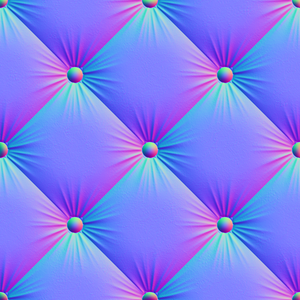
A Typical Normal Map
I'm pretty sure there is a way to generate the textures I needed in blender but I had become frustrated with blender and just decided the hell with it I'm gonna write my own software, With blackjack and hookers! The first step was building the rasterizer, lucky for me I happened to have a triangle rasterizer lying around. Then came loading in meshes and and processing them. I had decided to use a file format that blender natively supports, stanford (.ply)
The file format is simple, basically just an unbroken list of points and how they go together... Just one problem, it doesn't support The encoding of Tangents and Bi tangents...
All that tech jargon means I need to extra work to get them.
No problem right!
right?
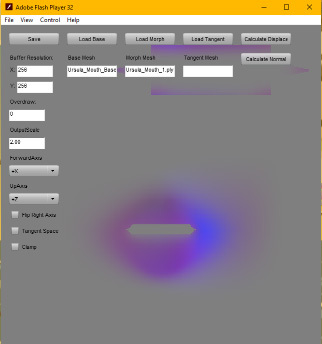
BEHOLD, DISPLACE-O! (Patent Pending.)
TANGENTS!!!
So for the less technically inclined among you, a Vertex Normal is a vector that points outward from a mesh and a tangent points along the mesh surface.
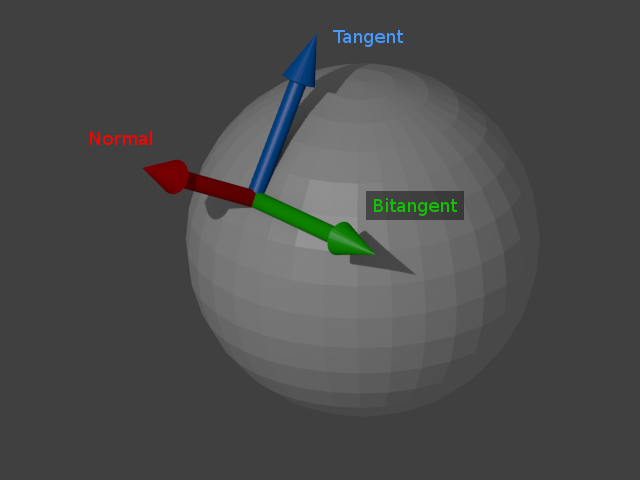
Example of Vertex Normal, Tangent, and Bi-Tangent.
All you need to know about them is that you need them to do just about everything to a 3D Mesh, from lighting to texturing, it's goes from being very useful absolutely required. and for what I was doing I needed all three.
It turns out calculating Tangents and Bi-Tangents is significantly more complicated then I had anticipated, I'm sure I could have figured out eventually, But I had already spend a few days just TRYING TO MAKE IT WORK TO NO AVAIL!
So I thought to myself why calculate something I know I can get from blender. So I opened the hood of blender and and did some good old modification to the stanford exported to include tangents and Bi tangents. Seeing as my Python as kinda garb-o and I know next to nothing about how blender works... It took a while but I got it working.
So now that I had my normal and tangents importing properly, it would turn out that not bother with them would have been just fine.... OK THEN!
UNREAL 4 is sometimes a bastard.
I'm really quite well acquainted with Unreal Engine. I'm very comfortable working with it, Turns out I was doing something they didn't really want me to do. For anyone in the back screaming Just use morph targets, Well that is the obvious answer but, Again my solutions needed to fit what I was already doing.
So at this point, I'm already about a week into this process that I anticipated only taking a day or two to bang out in it's entirety. So I have my textures and models load up in to Unreal and it look awful. It would have been at this point that a sane man would just give up and move on... BUT NOT ME!!!
So for whatever reason my Tangent space displacement textures worked like crap... I don't know whether it's my software or Unreal, but because I can, I'll blame Unreal for now. So, I decided, fine I'll just use a world space texture what could go wrong?
Jaws aren't supposed to look like that.
So I'm pretty confident what I'm about to say is true, there is no way in unreal to modify a skinned mesh before the it is skinned, what that means is I can't displace parts of a mesh before it gets animated. Not with out MORPH TARGETS
So why is that a problem.
So I tried my solution and I looked kinda funny, I though maybe that's just the limitation of this approach, so I made the character turn, their jaw didn't follow. Yay...
So I came up with a way to fix that, But then I had my character do a more complex animation, their jaw only pointed in one direction now. Yay...
Ok so the issuse is clearly that I need to map the displacement to the skinned mesh, no big deal, BUT I WAS A VERY BIG DEAL.
I was able to sort of get that to work by find the difference between the mesh and default location but the problem is there is now way to extract any sort of rotation or scale from this process.
So at this point I had almost gave up...
So how I fixed it in the end.
So in short What i need to do is apply bone transformations to the displacement before I can apply them, but since there was now way to do this in unreal I had to pass that information to the shader some how. And that's what I ended up doing, At the moment I am passing in two bone transformations to the shader, one for the head and one for the jaw, transforming the displacements and apply them and well.
IT WORKS!
So really this was all a really long and drawn out way of saying not only will Project Honey's character be more varied but more detailed and expressive than I could have hoped.
That's all I have for you today.
And with that, see ya'll again soon.
Look at that Smile! That's a winning smile!